Multiple Choice
Exhibit 3
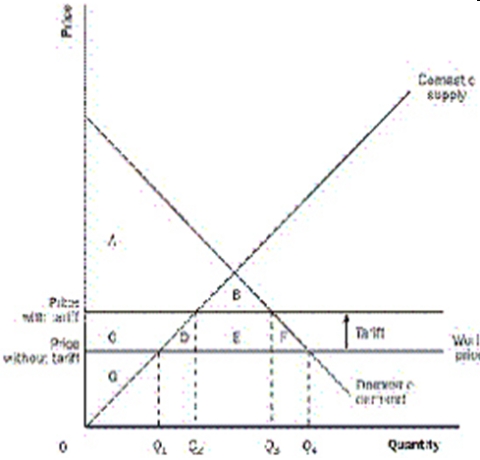
-Refer to Exhibit 3. The deadweight loss from the tariff is the
A) Area D + F.
B) Area E.
C) Area D + E + F.
D) Area B + D + E + F.
E) Area B.
Correct Answer:

Verified
Correct Answer:
Verified
Related Questions
Q5: Exhibit 1<br> <img src="https://d2lvgg3v3hfg70.cloudfront.net/TB8829/.jpg" alt="Exhibit 1
Q7: Using the graph, assume that the government
Q9: Suppose the world price is below the
Q11: Exhibit 3<br> <img src="https://d2lvgg3v3hfg70.cloudfront.net/TB8829/.jpg" alt="Exhibit 3
Q27: Points on the production possibilities frontier are<br>A)
Q29: A tariff raises the price of a
Q33: When a country allows trade and imports
Q37: If free trade is allowed, a country
Q48: The production possibilities frontier demonstrates the basic
Q49: Suppose a country's workers can produce 4